ADVERTISEMENT
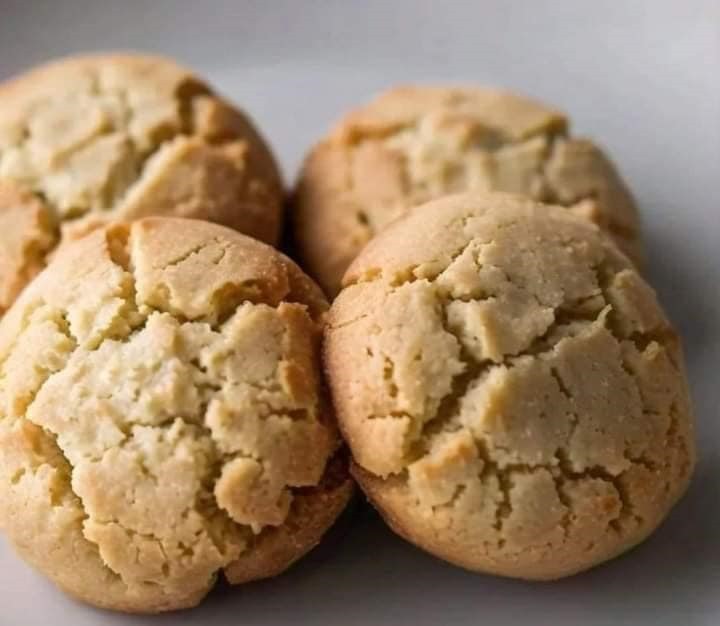
Making butter cookies from scratch is a breeze. Follow these simple steps to create a batch of golden, melt-in-your-mouth cookies that are sure to become a favorite.
Step 1: Cream the Butter and Sugar
- In a large mixing bowl, beat the unsalted butter and granulated sugar together using an electric mixer or stand mixer until the mixture is light and fluffy. This process, known as creaming, helps incorporate air into the dough, which makes the cookies lighter.
- Add the vanilla extract and mix again until fully incorporated.
Step 2: Add the Dry Ingredients
- Gradually add the all-purpose flour and salt to the butter mixture. Stir with a spoon or mix on low speed with your electric mixer until the dough comes together. It should be soft and slightly sticky but still easy to handle. If the dough feels too soft, you can chill it in the refrigerator for 30 minutes to make it easier to shape.
Step 3: Shape the Dough
- At this point, you can get creative with how you shape the cookies. If you prefer round cookies, simply roll the dough into small balls, about 1 inch in diameter, and place them on a parchment-lined baking sheet.
- For classic butter cookie shapes, you can roll the dough out onto a lightly floured surface and use cookie cutters to cut out fun shapes like circles, stars, or hearts.
- If you want to add a little flair, you can sprinkle the tops of the cookies with colored sugar or press a fork into the top for a decorative pattern.
Step 4: Bake the Cookies
- Preheat your oven to 350°F (175°C). Arrange the shaped cookie dough onto the baking sheet, making sure to leave some space between each cookie as they will spread slightly.
- Bake the cookies for 10-12 minutes, or until the edges are lightly golden brown. Keep an eye on them toward the end of the baking time to ensure they don’t over-brown, as butter cookies can bake quickly.
Step 5: Cool and Enjoy
- Once baked, remove the cookies from the oven and let them cool on the baking sheet for a few minutes before transferring them to a wire rack to cool completely. This ensures they hold their shape and don’t crumble.
- Once cooled, you can enjoy the cookies as they are, or decorate with a dusting of powdered sugar, a drizzle of glaze, or a few sprinkles for an extra festive touch.
Variations and Add-ins for Butter Cookies
While classic butter cookies are delicious on their own, they also lend themselves well to variations. Here are a few ideas to customize your butter cookies and give them an extra twist:
- Chocolate Chips: Add a handful of mini chocolate chips to the dough for a delightful mix of buttery goodness and chocolatey richness.
- Lemon Zest: For a fresh, zesty flavor, add zest from one lemon to the dough. The citrus notes will brighten the cookies and balance the richness of the butter.
- Nuts: Add chopped pecans, walnuts, or almonds to the dough for a nutty crunch that pairs wonderfully with the buttery flavor.
- Cinnamon Sugar: Roll the cookie dough balls in cinnamon sugar before baking for a warm, spiced twist on this classic treat.
- Icing: For a festive look, pipe a simple glaze on top of the cookies once they’ve cooled. A mix of powdered sugar, vanilla, and a bit of milk can make a lovely glaze that adds sweetness and shine.
- Jam or Chocolate: Press a small thumbprint in the center of each cookie and fill it with a dollop of your favorite jam, or add a square of chocolate for a gooey treat.
Storing and Freezing Butter Cookies
Butter cookies are perfect for making in advance. Here’s how to store them:
- Storing: Keep the cookies in an airtight container at room temperature for up to one week. You can layer them with parchment paper to prevent them from sticking together.
- Freezing: If you want to make a big batch ahead of time, freeze the dough before baking. Roll the dough into a log, wrap it tightly in plastic wrap, and freeze for up to 3 months. When you’re ready to bake, slice the dough into rounds and bake as usual. You can also freeze the baked cookies, which will keep for about 2-3 months.
Why Butter Cookies Are a Classic Favorite
There are many reasons why butter cookies have stood the test of time:
- Simplicity: With minimal ingredients and preparation, butter cookies are the perfect baking project for beginners, kids, or anyone looking for an easy treat that doesn’t compromise on taste.
- Rich, Buttery Flavor: The taste of butter is the star of this cookie, and it’s what makes them so addictive. The flavor is smooth and satisfying, without being too sweet.
- Perfect for Gifting: Butter cookies make a lovely homemade gift. Pack them in a decorative tin or jar, and you’ve got a thoughtful treat for friends and family.
- Adaptability: Whether you’re baking for a special occasion or just because, butter cookies can be dressed up or down to fit any theme, season, or personal taste.
Conclusion
If you’re looking for a treat that combines simplicity, flavor, and versatility, butter cookies are the perfect choice. These melt-in-your-mouth delights bring the perfect balance of richness and sweetness, and their timeless appeal makes them a favorite among both kids and adults.
With a few basic ingredients and minimal effort, you can create these comforting cookies to enjoy alone or share with others. So, next time you’re in the mood for something sweet, don’t hesitate to whip up a batch of buttery goodness—you’ll be glad you did!
ADVERTISEMENT
