ADVERTISEMENT
Step 1: Prepare the Pie Crust
- In a large bowl, whisk together the flour and salt. Using a pastry cutter or your fingers, cut in the cold butter until the mixture resembles coarse crumbs.
- Gradually add ice water, one tablespoon at a time, and gently mix until the dough comes together. Form it into a ball, wrap in plastic, and refrigerate for at least 30 minutes.
- Roll out the dough on a lightly floured surface, place it into a pie dish, and crimp the edges. Use a fork to prick the bottom, then bake at 375°F (190°C) for 10-12 minutes, or until lightly golden. Set aside to cool.
Step 2: Make the Chocolate Filling
- In a medium saucepan, whisk together the sugar, cocoa powder, flour, and salt.
- Gradually whisk in the egg yolks and milk until smooth. Place the saucepan over medium heat, stirring constantly, until the mixture thickens and begins to bubble, about 8-10 minutes.
- Once the filling has thickened, remove it from heat and stir in the butter and vanilla extract until smooth and glossy.
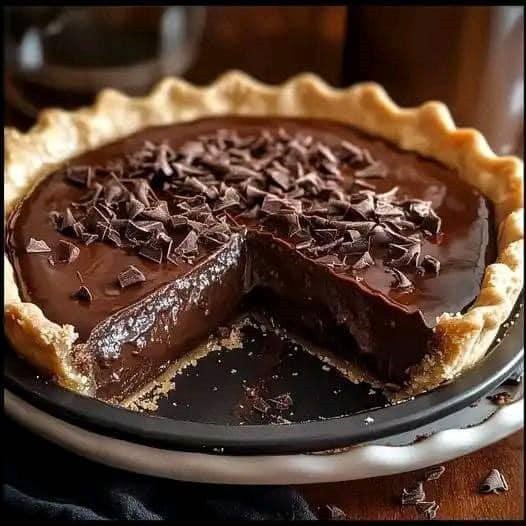
- Pour the chocolate filling into the prepared pie crust and smooth the top with a spatula.
Step 3: Prepare the Topping (Optional)
- For a classic meringue topping, beat the egg whites in a clean bowl until soft peaks form. Gradually add the sugar and continue to beat until stiff peaks form.
- Spread the meringue over the chocolate filling, making sure it reaches the edges to prevent shrinking.
- Place the pie under the broiler or in a 350°F (175°C) oven for 3-5 minutes, or until the meringue is lightly toasted.
- Let the pie cool completely before slicing.
Step 4: Serve and Enjoy
Serve Grandma’s Chocolate Pie at room temperature or chilled. It’s delicious on its own, but it also pairs wonderfully with a dollop of whipped cream.
Tips for the Perfect Chocolate Pie
- Stir Constantly: When making the chocolate filling, keep stirring to prevent lumps and ensure a silky, smooth texture.
- Don’t Over-Bake the Crust: Pre-baking the crust for just a short time keeps it flaky without over-browning once the filling is added.
- Meringue Success: For a stable meringue, ensure there’s no egg yolk in your egg whites, and use a clean, dry bowl for beating.
- Let It Set: Allow the pie to cool completely before serving for the cleanest slices and best texture.
Why Grandma’s Chocolate Pie Will Always Be a Classic
There’s something undeniably comforting about the taste of Grandma’s Chocolate Pie. It brings a wave of nostalgia and evokes memories of home, family gatherings, and joyful times around the kitchen table. The rich, velvety filling paired with a delicate crust makes each bite a celebration of old-fashioned goodness.
Whether you’re making it for a special occasion or just craving a taste of the past, Grandma’s Chocolate Pie is bound to be a favorite in your home. Simple yet satisfying, it’s a recipe you’ll want to pass down, keeping the tradition alive for future generations.
Try making Grandma’s Chocolate Pie, and enjoy the timeless comfort of this classic dessert. It’s a little piece of history on a plate, and once you take that first bite, you’ll see why it’s been loved for generations.
ADVERTISEMENT
